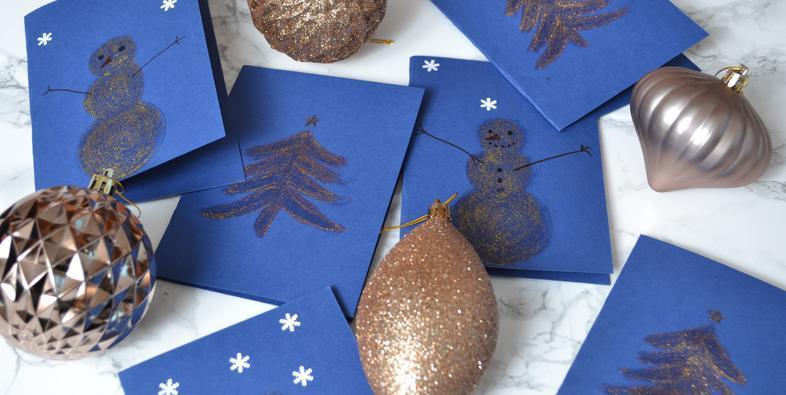
DIY Christmas Cards
We absolutely love these Christmas card designs – they’re simple to do with all ages of children and their subtle, yet festive design makes them a great card for all your family and friends. Alternatively, they’d make lovely decorations for around the house!
What you need:
- Coloured Card (Our personal favourite was dark blue so the glitter really stood out!)
- Glitter Paint (we picked gold and rose gold)
- Paintbrushes of varying sizes
- Pots for the paint
- Felt tip pens (black, brown and orange)
- Glue
- Snowflake paper cutter
- White paper

1. To start, cut and fold your card to your desired shape and size. We cut A4 card in half, and then folded them in half to obtain the size we wanted for our cards.
2. Take your glitter paint of choice and begin painting the bottom circle of your snowmen, followed by the middle, and then the top. It may be easier to draw around something circular to obtain the rough shapes of each circle.
3. Do this for every card you would like a snowman on the front, and then set them aside to dry.

4. While the snowmen dry, take your card and begin painting on your Christmas trees. How you do these is entirely up to you, but we began at the top by painting a wide, upside down V shape. We then replicated this shape until we had the number of branches we wanted.
5. Once the trees have a shape and branches, add in the stump to the bottom and a star at the top. We drew on the outline of a star to start, and then used a very small paintbrush to fill it in with the glitter paint.
6. Again, once all of these are done, set them aside to dry.
7. By this time the snowmen should now be dry. Depending on how glittery you would like them, you may wish to fill the circles in with more paint to make them standout more. When they are fully dry it is then time to add in the snowmans features!
8.Using the brown felt tip, draw in two stick arms for each snowman. Then with the black felt tip, add in his eyes, mouth and buttons. Finally, take the orange felt tip to draw in his nose!
9. Next, take the white paper and using the paper cutter, cut out the snowflakes (you will probably need about 4 per card).
10. Dot the glue where you would like the snowflakes, and then carefully stick the snowflakes on top. Once this has been done, and dried, your snowmen Christmas cards are now done!


11. We kept the Christmas trees very simple, and once the first layer of glitter was dry, added in some rose gold glitter paint over the top of the gold glitter. If you wanted to add more detail, then you could paint presents at the bottom of the tree, or add baubles to it using different coloured glitter paint.
12. The fronts are now all done, so all that is left to do is add your message inside!
We would love to see your Christmas cards, so do be sure to tag us in any snaps on Instagram, and for more festive ideas head to our Pinterest here.


